|
|
|
|
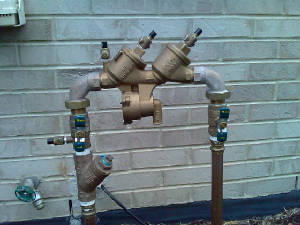
An RPZ valve correctly installed. (Notice the test ports are pointing up)
Step 1 Reinstall RPZ valve back on to the piping on the outside of the
house. The arrow on the side of the valve shows the flow of water. The arrow should point to the pipe that goes into the ground.
The 3 test valves on the RPZ face upwards, the big drainage hole faces down. When connecting the valve to the unions make
sure the O-rings are still in the groove on the RPZ. Step 2
Close the drains and turn the water on. Plug the control timer and pump in if they were unplugged for the winter. Step 3 Run each station for 2-3 minutes and check all heads to make sure they
are spraying correctly. Sometimes the snowplows damage the heads or the grass grows over them. Step 4 Call us for the RPZ certification. Please click here to see our service packages and schedule a Spring Start
Up. Winterization Instructions 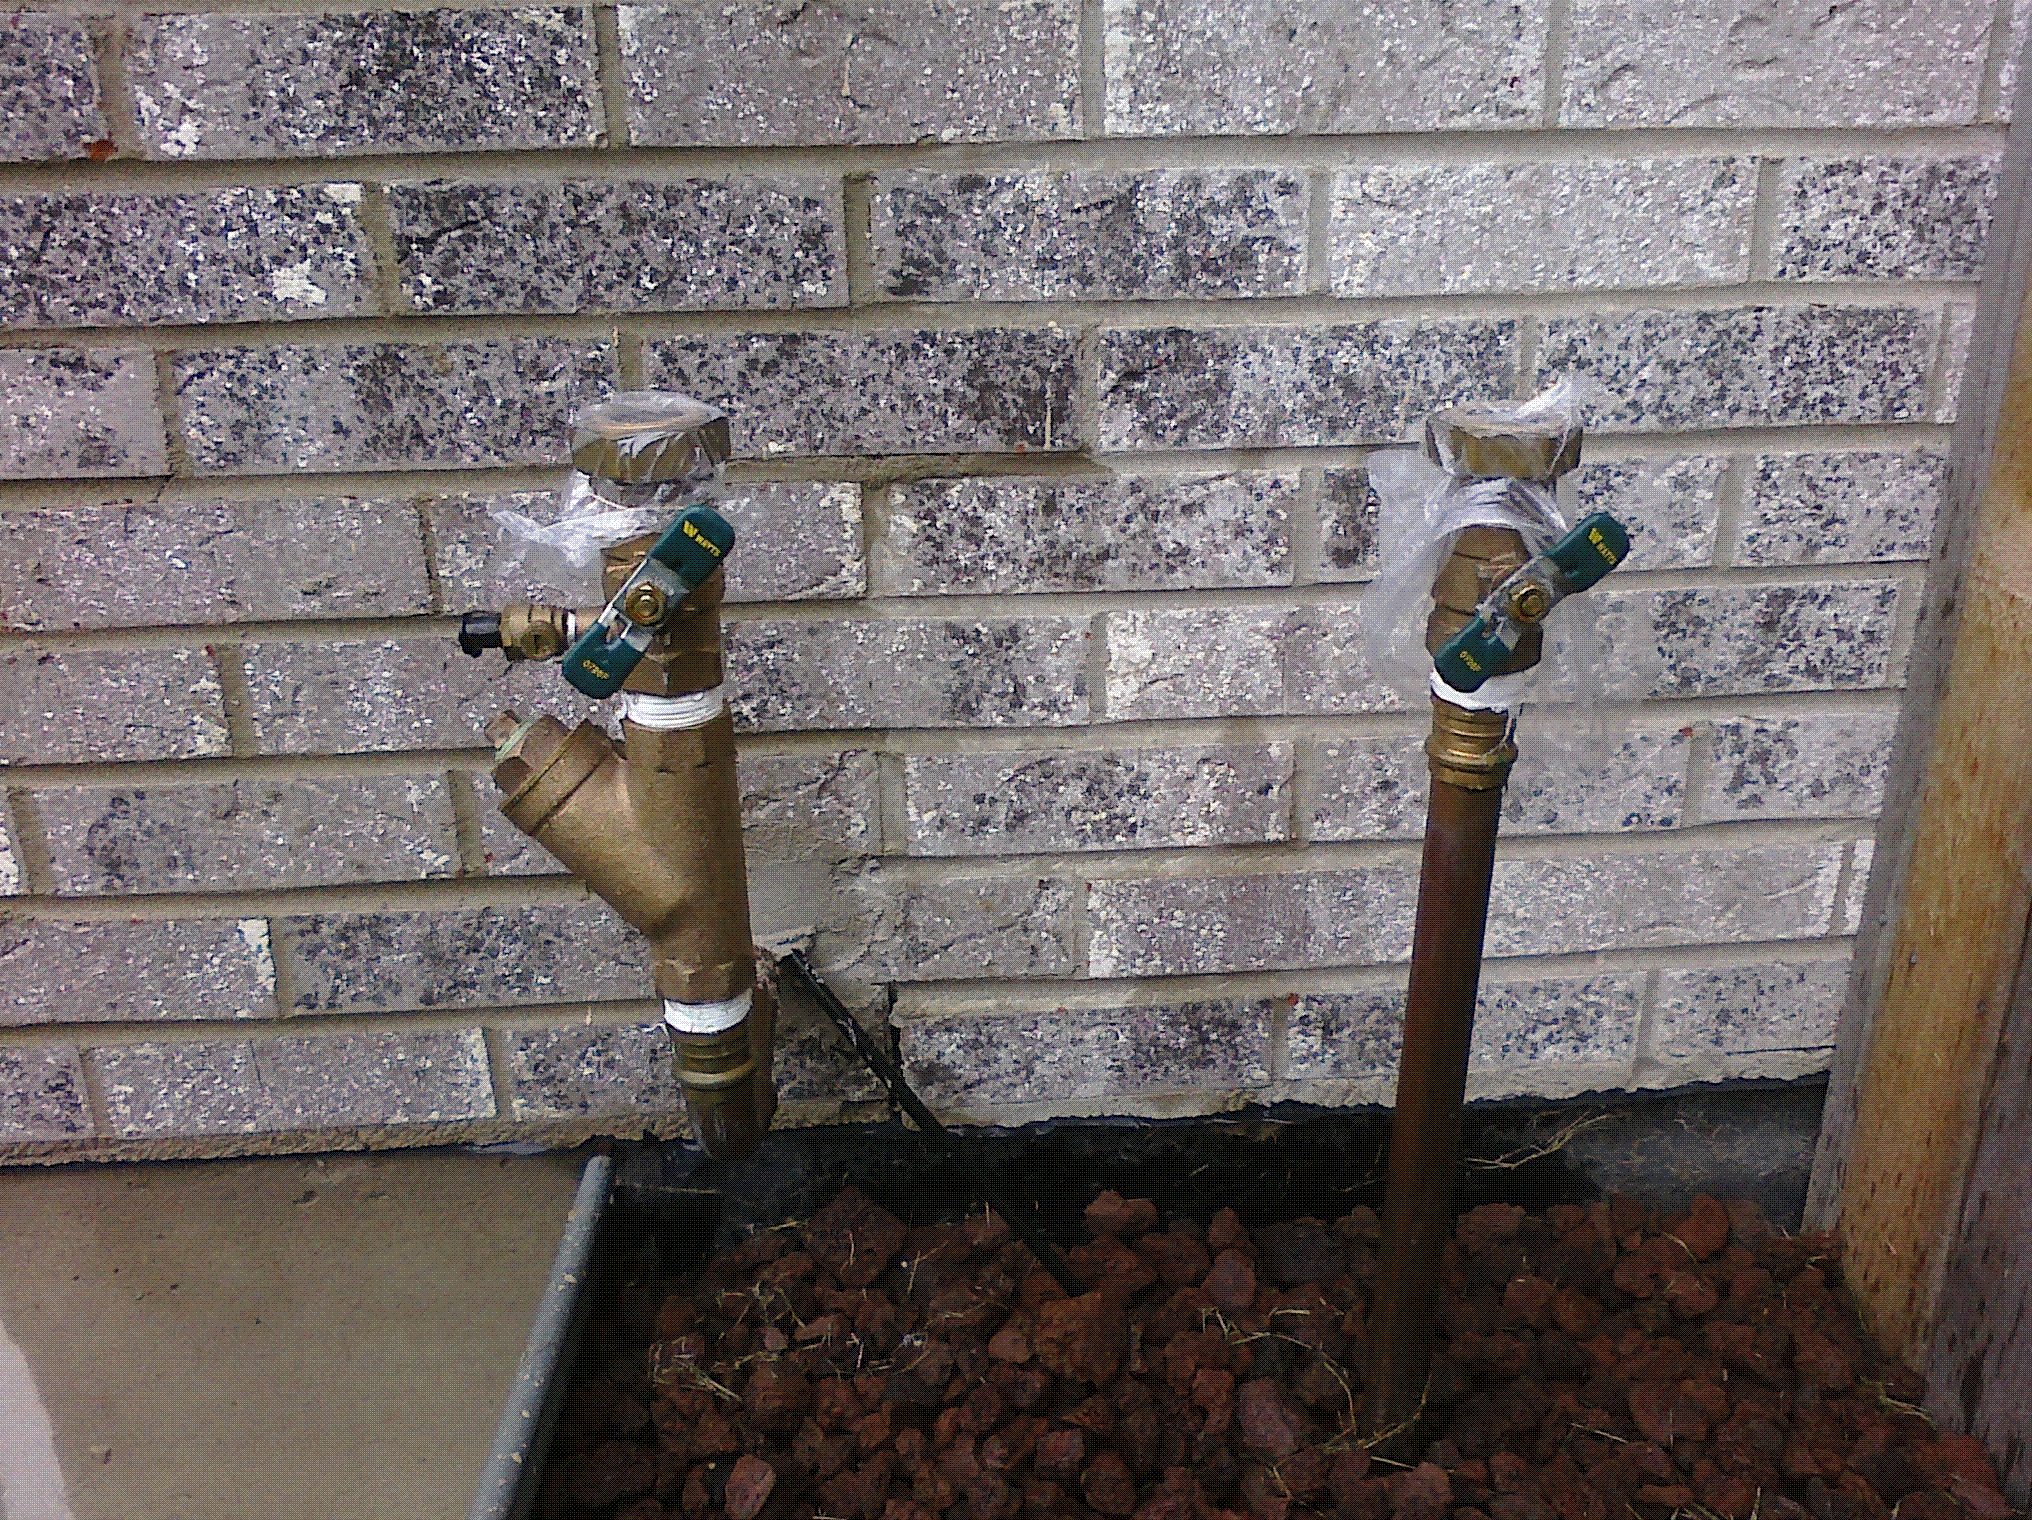 Notice the handles are at 45 degrees and there are bags over the open ends Step 1 Shut off water valve for sprinklers. Step 2 Go outside and remove RPZ valve. This is done by loosening the unions
on each side of the valve and lifting the unit out. Bring the RPZ inside for the winter. Step 3 Turn valve handles at a 45 degree angle on the outside piping. This is 1/2 on
and 1/2 off. This is very important or the valves will crack and you will pay for new ones. Step 4 Place plastic bags over the exposed ends. Step 5 Locate sprinkler drain. If located inside, open and drain into a bucket. If
located outside, open and leave open for winter. Step
6 If you have a booster pump for the sprinkler system only, unplug at this time. Failure to do so may result in pump damage
not covered by warranty. Step 7 Program all stations
to run for 5 minutes each. When cycle is over turn off clock. You will not see or hear anything happening during this last
step. |
|
As you can see, it is very simple to maintain your system
yourself and save money. If you feel that you do not want to maintain the system yourself, we have service plans available
for your convenience. Please click here to Schedule a Winterization. We thank you for selecting our company and look forward to
giving you the very best service and products available. If you ever have questions, please don’t hesitate to call. Email: info@krupskesprinklers.com
|